The Inspired Hive

Inspiration for a creative home

Search

Chalkboard wedding crafts

Only eighteen days until my sister-in-law's wedding! Pete and I are super excited for Nikki and Chad's barn wedding! It's going to be so fun and the decor she's been working on is so cute!! 

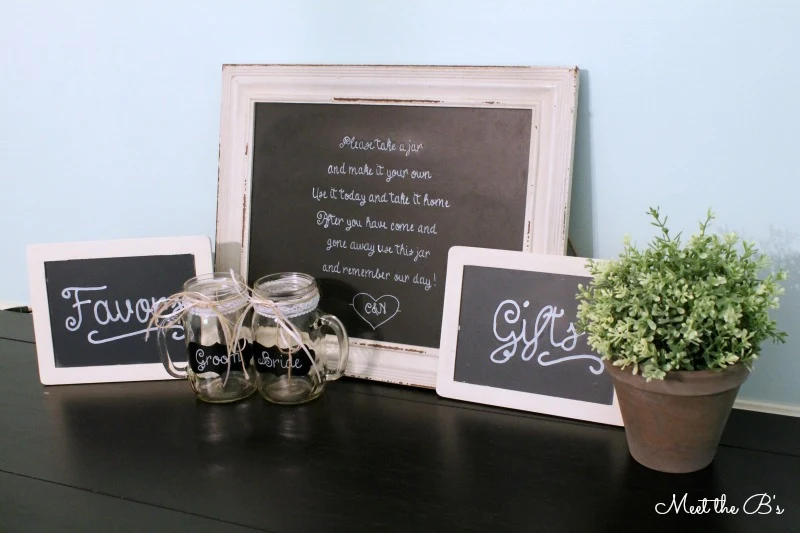
Nikki asked me to work on a couple of things for her a few weeks ago, and I finally got around to finishing so I thought I would share! Nikki gave me a couple of chalkboards to make signs that say "favors" and "gifts." She provided me with a bigger chalkboard to write a poem about the mason jar drinking glasses they will be giving to guests. She also loved the mason jar bride mug I made for her bridal shower and wanted a set for the wedding.

DIY Chalkboard Wedding Crafts

For the bride and groom mug, I used pretty much the same method as the first time I made one, except this time I used some chalkboard labels since I didn't have another pre-labeled mug. I also used my font-transfer method to make pretty chalkboard writing! 

DIY Chalkboard Wedding Crafts

For the signs, I ran into a little bit of trouble. Nikki gave me a chalkboard marker to use for the signs. I made the "favors" and "gifts" signs and wasn't super happy with how they looked. The marker was really thick and the liquid ink was very runny. When I started to work on the poem, I stopped after the first line because all of the ink was running together. I chatted with Nikki about it and decided I would use a paint pen instead. I just thought it would look neater.

The chalk marker I had used said "wet or dry erasable" on the side of it. Wellllll.... it did not erase at all!!!! I scrubbed with water, I scraped with a razor blade, I tried dish soap, I even used a Magic Eraser. Nothing worked. I really thought I ruined her chalkboards! After an hour or so of freaking out and trying everything I could think of, I did some research online (and found many posts of people similarly freaking out!) and read that ammonia works. So I whipped out the Windex and gave it a whirl. What do you know? It worked!!! The ink easily came off with a paper towel. You can see a bit of a shadow where the previous ink was, but I just used that as an outline to trace. It all worked out fine!

DIY Chalkboard Wedding Crafts

I'm really excited to see all of Nikki's decor come together! I love barn weddings and I LOVE chalkboards!!! :)

DIY Chalkboard Wedding Crafts

Linking up: Hump Day Happenings // Work It Wednesday // Tatertots & Jello // Liz Marie Blog // Design, Dining, & Diapers // The SITS Girls

post signature

If you liked this post, subscribe for e-mail updates!

Goodbye, holly tree!

Okay, so this isn't exactly a finished project, but I'm too excited not to share it! It's probably not exciting to anyone else except for Pete and I, but it makes such a huge difference in our yard!

Near the beginning of my blogging adventure, I posted about how much we loathe this giant holly tree.


Several people have told us that they like it. A few have even said it's pretty. But we still hate it. Maybe if it were on the side of the yard, or maybe further back. But nope. Somebody made the wise decision to plant it right smack in the middle of the yard. 


I'll admit, it was pretty in the snow this past winter, but that's the only time I've semi-liked it. Pete and I vowed to demolish it as soon as possible. 


Yesterday, Pete's best friend Billy came up to visit. They're going on a bachelor trip this weekend and meeting at our place the day before made a nice break in driving time for Billy. We both love when he visits. He's an awesome guy. Now, he's even awesomer (yes, I said awesomer) because he showed up with a chain saw!

I couldn't be more excited to have this thing out of our yard! And I'm pretty sure they had a blast chopping it down :)


Look at how much bigger our yard looks without it!!!! :)

We still need to rake up all the leaves that were under it and grind the stump, but it already looks a million times better!!


post signature

If you liked this post, subscribe for e-mail updates!

Restoration Hardware Knock-Off

Easy DIY Restoration Hardware inspired skeleton key shadow boxes. Get the look for less with this knock off idea!

As you know, we've been working on decorating our living room. I've still been looking for art for the living room because the walls are so bare. I've had my eye on these beautiful shadow boxes at Restoration Hardware for a while, but at $90 per shadow box... not in the budget! So it was time to DIY of course :)

Spring Tulip Planters

 DIY Painted Spring Planters- An easy Easter craft and great gift idea!
My husband's family has an Easter tradition of giving each family a gift. It's usually something simple like a potted plant or flower. This year I wanted to give them all something they could use again so I made these DIY spring planters! The pots can be used again and the tulip bulbs will grow back next year!

Monthly Subscription Box Review

Subscription boxes are all the rage these days. I never ever thought I would be someone to get a monthly subscription box. Sounded like throwing away money to me. However, back in October, one of my good friends was raving about the Popsugar Must Have Box and was looking for referrals so she could get one free month. I thought, why not, I'll look into it. Can't hurt to help a friend, right? So I looked at the Popsugar blog of past boxes and was impressed with the items they showed. I decided to help out my friend. I meant to just purchase one month.. And so it began! 


I am LOVING this subscription box! I just received my sixth box a few days ago and plan on signing up for another 3 month order! Please note, I am NOT getting paid for telling you about the Popsugar Must Have Box! I just wanted to share something I love!! :)

The best thing about this subscription box is that it isn't limited to one thing. They send cosmetics, jewelry, accessories, books, health/fitness items, candles, food, and more! So it's always a surprise to see what you might find in the box. I wait not-so-patiently the moment I get the shipping notification for it to arrive! I will say, it is one of the more expensive boxes I've seen at roughly $40/month, BUT they guarantee to send over $100 worth of merchandise in each box (and most of the time they surpass that amount!). That means you receive pretty high quality stuff! And it's not just sample sized items! They also send awesome coupons and occasional gift cards, provide free boxes for referrals, and sometimes host contests! I have no complaints at all!

Here's the April box, which is one of my favorite boxes!

Here are just some of the items I have received over the past six months... If it's not pictured it is because a) I ate it already, b) I have used all of it, or c) it's too big to fit in the picture!


Items pictured above:
Food items received not pictured above:
Other items received not pictured above:

My favorite items have been the strawberry and blackcurrant jam, pipcorn, snapea crisps, the calendar, lip gloss/ lipstick duo, and the eyeshadow pallette. Love all of it!

I definitely recommend this box! I'm already waiting for the May box to arrive!
Sign up if you're interested! Use code REFER5 to save $5 on your first box! Enjoy!

Do any of you have a monthly subscription box you've fallen in love with? Please share!!!

post signature

If you liked this post, subscribe for e-mail updates!

Free Printables for the guest room!

Remember the password art and "be our guest" sign I made for our guest bedroom makeover? Today, I'm going to share them with you! This is my first time sharing printables, so bear with me...

Free printable guest room art | Meet the B's

I'm super excited to be able to share these free printables with you! I hope you enjoy them!

Free printable wi-fi password art | Meet the B's

Theoretically, you should be able to right click on the photos below to open the full size image in a new tab or window, then right click on the image to save it to your computer. You should then be able to print it.
You can also access all of my printables via Google Drive.

Again, these are my first printables, so please please pretty please let me know if it's not working correctly or if you know of a better way to do this!!!! Thanks everyone :)

Free printable guest room art | Meet the B's
Free "Be Our Guest" Printable

Free printable wi-fi password art | Meet the B's
Free Password Printable


Linking up here: Mommy Is CoocooThe Turquoise HomeLiz Marie BlogDesign, Dining, & DiapersTip Junkie

post signature

If you liked this post, subscribe for e-mail updates!

April Monthly Goals

Happy April, everyone! If you've been following along, you know I didn't complete many projects in March thanks to my awful night shift schedule. I'm excited to say that I work night shift this week and then I work day shift until mid-May! WOOHOO!!!!! So hopefully I will be very productive!!!
I'm not going to rehash my March goals for you because there is not much checked off the list at all! So if I didn't complete my to-do list, what on earth did I get done? Well...
I guess I don't look like that much of a slacker when you put it into a list like that ;)

So what am I going to accomplish in April? I don't want to get too specific for April because Pete and I want to focus on getting some outdoor stuff done and I really have no idea how long those projects will take! We also both have multiple bachelor/bachelorette parties this month and back to back weddings in the beginning of May. So I know we are going to be crazy busy! But here are some general things...

  • I have several blog things to figure out and take care of (for instance, paragraph spacing issues in Blogger... so frustrating to go back and correct spacing in posts over and over again!)
  • Post a few things from our DIY wedding.
  • I would LOVE to actually get the stairwell and hall painted this month. Again, we need to find someone to help us buy an extendable ladder because we don't have a truck. 
  • Finish the dining room artwork I started last month.
  • Work on the yard!
We have TONS to do outside! 
  • Set up the pond we've been planning for months.
  • Remove bushes in front of the house and replace with flower garden.
  • Install new mail box.
  • Cut down giant holly tree in the middle of the backyard.
  • Buy patio furniture.
  • Figure out how to remove ivy ground cover for good and remove it from backyard.
  • Transplant azalea bushes (we'll probably wait until fall, but it's on our to do list!).
  • Mulch all of the gardens.
  • Plant the tree we used for our wedding "tree cermony" :)
There are plenty more items on our outdoor to-do list, but those are the things we want to get done this year! Yikes! We better get started!!!
post signature

Goodbye, blue wall. Hello, guest bedroom!

It took me all of March to finish the guest bedroom, and it STILL isn't even completely done!!! I'm still blaming night shift for my lack of productivity, but this week I am on dayshift (although back to nights next week) and the room has come along enough that I can show you some progress!!!

First, let me say that Pete and I wanted our guest bedroom to be different than the rest of our house. This room isn't about us. It's about our guests. So we want it to be an inviting space. Most of our house guests are around our ages, so we decided to gear this room style-wise to appeal to them while still including necessities to accommodate our slightly older guests (Hi, mom & dad!). We went for a fun and contemporary style with lots of geometric patterns in bright bold colors. I was a little nervous about this since I'm a neutral lover, but I'm actually finding myself jealous and wishing I had this room back in my bright and colorful dorm room days!! 

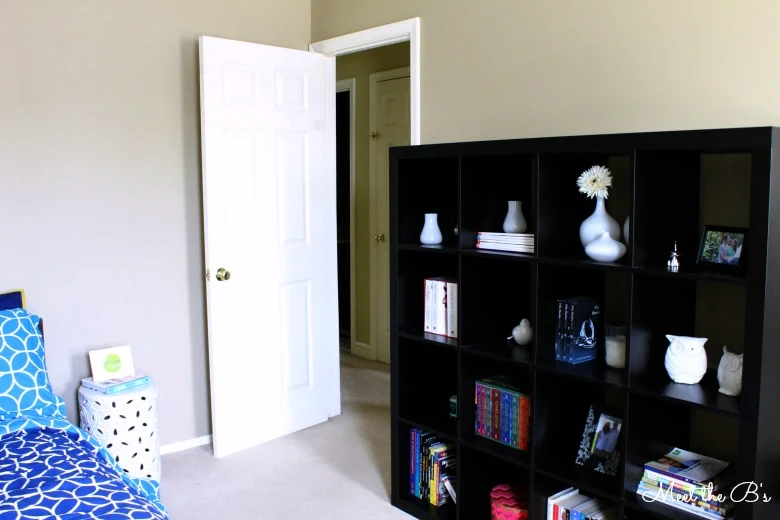
The previous owner painted the room beige with one blue wall. It's really not a bad color blue, but I would just rather have neutral walls with all the bright colors we have going on with decor. Luckily, the owner left us with leftover paint for the whole house, so I already had the exact shade of beige I needed to match the other three walls. We were ready to say goodbye to the lonely blue wall!

Geometric Guest Bedroom | Meet the B's

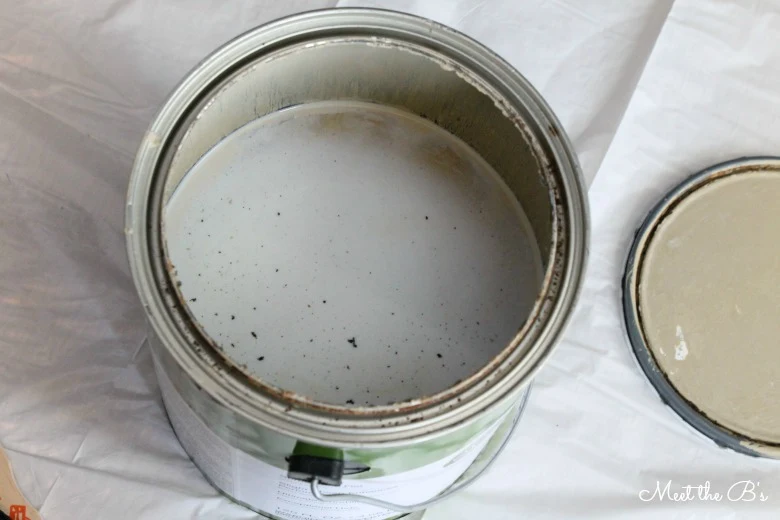
Unfortunately, when I opened the can, a TON of rust fell from the edges into the paint. 

Geometric Guest Bedroom | Meet the B's

I was so upset thinking I ruined the paint! I actually tried straining the paint through panty hose into another container. Haha! Guess what? It didn't work. However, it did get rid of the top layer of paint including enough of the rust specks that I felt the paint was okay to use. So I slapped on the first coat
!
Geometric Guest Bedroom | Meet the B's

After two coats, I loaded in the decor that I had purchased and/or created so far. It still needs a few finishing touches, but at least you can see the vision!

Geometric Guest Bedroom | Meet the B's

I still need to fill in pictures/art in the frames on the shelf above the bed. I would also like to find a few more small accessories like a vase or candles.

Geometric Guest Bedroom | Meet the B's

I found this ceramic garden stool at Homegoods. I thought the colors of my Young House Love book made it fit for decor :) I created a small "Be Our Guest" print to go on top of the stool. It's hard to tell in the photo, but the background of the print is grey chevron.

Geometric Guest Bedroom | Meet the B's

I've had this shelving from Ikea for a long time. I thought this was the perfect use for it! I just need to find some better accessories to go in it instead of filling it with Harry Potter and Twilight books ;)

Geometric Guest Bedroom | Meet the B's

I found those super cute mirrors on clearance at Hobby Lobby! The dresser is Pete's old one from his apartment. I'm still on the hunt for curtains (for the whole house actually). I'm hoping to find a solid greenish yellow to match the colors in the throw pillow patterns.

WiFi Password Art | Meet the B's

I also created this cute wi-fi password art!! I'm hoping to come up with a more clever password and then reprint it, but at least now guests can easily access the internet while they are here! I clearly need some flowers for that vase too ;)

I also plan to put together a basket of supplies (towels, bathroom goodies, water bottles, etc.) which I will probably place on the dresser.

Almost complete! What do you think so far?

post signature
Linking up at: The Turquoise HomeDesign, Dining, and DiapersTatertots and JelloIt's Overflowing

How to control countertop clutter

I don't know about you, but we get a TON of mail. We of course get the usual bills and personal mail, but we also get some mail for the previous owners. Also, when you buy a house, your name is given to tons of local companies, so we get tons of "Hey, new neighbor! Call us today for your free estimate!" mail for siding, doors, windows, yard work, pest control, you name it. Then we get tons more ads and coupons for tons of businesses. You know, the ones that just say "Current Resident" instead of your name. And of course there are the credit card offers. Ugh. Thanks, but no thanks! Too much mail!!!

We tend to walk in the door with a handful of mail and place it on the counter. So, all of those unnecessary papers lead to our countertop looking like this most days....

How to control countertop clutter | Meet the B's

We needed a solution. Desperately.

So I decided to make a cute little tray to keep on the counter. When we bring the mail in, we'll immediately throw away, shred, or recycle any mail we don't need (ads, coupons, credit card offers, catalogues, etc. The rest of it, instead of sitting in a giant pile on the counter, will go into the tray. At least then it won't look so sloppy! I'm also going to look into how to stop the junk mail. (Let me know if you have any tips!)

DIY Painted Mail Tray | Meet the B's

Here's how I made the tray...

I painted an unfinished wooden tray (which you can buy at any craft store) with black paint. You could also use a previously painted or stained tray if you have one. You'll just need to sand it first.

DIY Painted Mail Tray | Meet the B's

Then I printed out the word "MAIL" in the font I wanted to use. I was too scared to free hand on such a small surface area. With nowhere to rest my hand, I would definitely not have a steady hand! I ended up using "Sketch Serif" from dafont.com. I did end up changing the font a bit by not filling in all the tiny little lines, but only because my paint pen is too thick for those lines.

DIY Painted Mail Tray | Meet the B's

In my last chalkboard project, I transferred the print using chalk, but its such a messy process I decided to try a different transfer technique. I used pencil!

Transfer Technique | Meet the B's

I covered the back of the paper with pencil. Then, I centered the paper on the side of my tray and traced over the letters with the pencil. Press down hard with the pencil so that the lead on the back of 
the paper will transfer to your project. 

Transfer Technique | Meet the B's

Yay! Much less messy than chalk! 

DIY Painted Mail Tray | Meet the B's

Then I traced the pencil markings with my white paint pen. I love paint pens so much.

DIY Painted Mail Tray | Meet the B's

And voila! My very un-sloppy countertop!!!

DIY Painted Mail Tray | Meet the B's

post signature


Linking up here: Tiny SidekickCity FarmhouseThe Turquoise HomeDesign, Dining, and DiapersThe 36th AvenueLiz Marie BlogTatertots and JelloIt's OverflowingI Heart Organizing

Featured here: 

Organizing Junkie